
Walnut Humidor
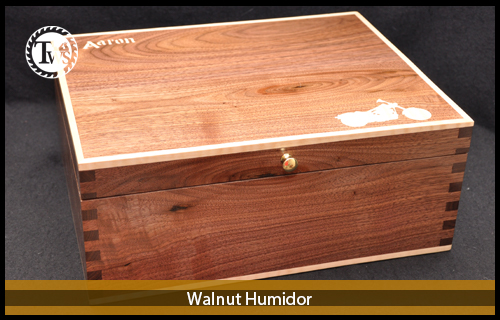
The inside is lined with cedar. No problem I have a ton of cedar in my shop. Nope, not all cedars will work apparently. Oh no, not the Western Red Cedar that I have which can instill a flavor to the cigars, it needs to be Spanish Cedar. So I ordered some 1/4″ Spanish Cedar that I lined the inside of the lower box and the perimeter of the top.
This humidor I was commissioned to make for a fathers day gift. The client wanted the silhouette of a motorcycle and her husbands name inlayed into it. I used my laser engraver to cut out the inlays and also to dish out the voids. The laser engraver takes a lot of the guess work out of inlays. The sides are made of Walnut and joined using very strong box joints. I accented the top and bottom edges with Curly Maple.
The top when dropped closed, yes I said dropped closed, actually doesn’t slam shut. It closes easily on a cushion of air because of the pressure generated by that airtight seal I mentioned earlier. This took a bit of effort hand fitting and planing the pieces of cedar so the top just barely clears the front piece when closing but also marries up with the pieces installed in the lid.
This was the first time I’ve installed quadrant hinges also. I made a jig to cut the hinge mortises with my laser engraver that registered off the back corners of the box. I used a Dremel tool with a 1/8″ carving bit to hog out the voids for the hinge supports to fall into.

Oval Tear Drop Shaped Routed Box


You must log in to post a comment.